VARIABLE INDICATING GAUGES & SETTING MASTERS
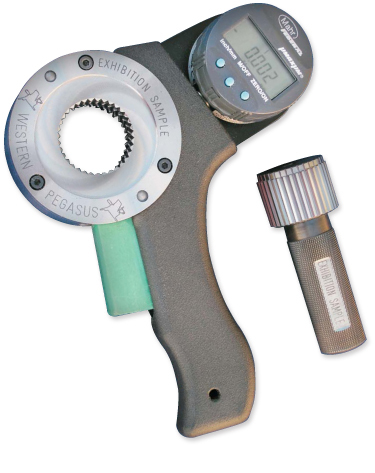
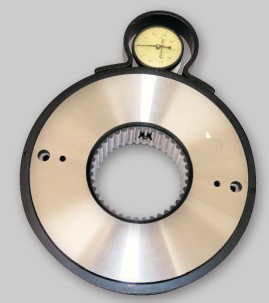
Variable Gauging (Spline Variable) is a segmented concept that is pre-set to a master plug or ring gauge and is designed to accurately measure the effective or actual tooth thickness or space width within 0.0001” (0.0025mm). The 0.001mm resolution indicator clearly displays variation in size due to heat treatment distortion, tool wear and manufacturing deviation.
Spline Variable Options:
- Plug and Ring type Configurations
- Handheld or Bench Mounted
- Composite (Effective) or Sector (Actual) Versions
- Adaptable to leading statistical quality control systems (IE: Federal, Mitutoyo, Sigma, etc.)
COMBO CHECK
Ring Type – Indicating Dimension Over Balls Anvils
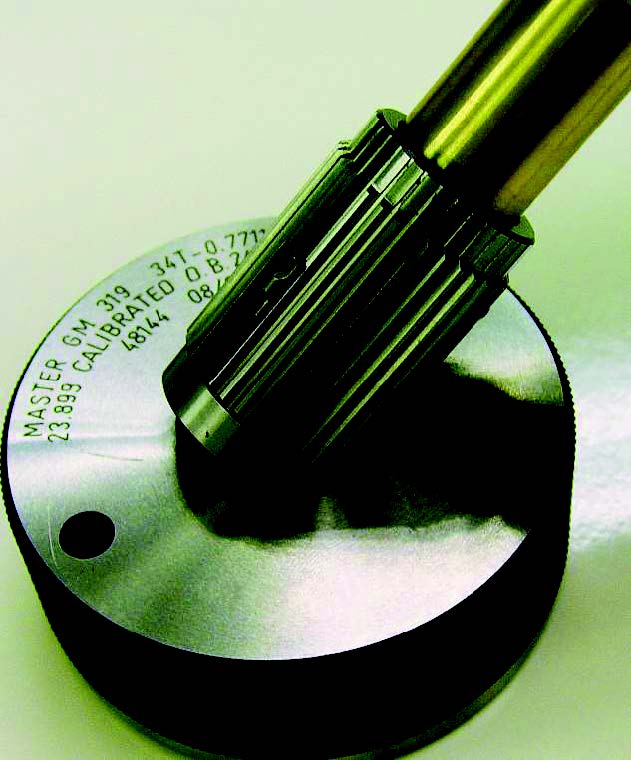
Plug Type – Indicating Dimension Between Ball Anvils
The effective “Combo Check” gauge combines a go composite form with carbid pins/ball anvils (manufactured to the same diameter as component pins) that contact the part on a single plane providing dimension between/over balls size.
The “Combo Check” gauge is pre-set to a Master Plug or Ring and is used to measure the variation between or over pins or balls. Depending on the type of indicator used, the variation can be shown as either an actual dimension between/over balls or the variation in .0001″ (.0025mm) increments. To reduce the amount of rocking required to get an accurate measurement, the tooth width form of the spline guide is manufactured above or below the minimum/maximum effective to reduce the measurement bias due to misalignment.
The proprietary trigger mechanism on the plug type, fully retracts the pin anvils which not only increase accuracy and repeatability, but protects component parts as well.
Combo Check Options:
- Plug and Ring Type Configurations
- Handheld or Bench Mounted
- Composite or Sector Versions
- Adaptable to leading statistical quality control systems (Federal, Mitutoyo, Sigma, etc.)
Gauge Also Used to Check:
- Taper
- Hollow
- Crown
- Out of Round
GAUGE MATERIAL OPTIONS
The best gauges start with the most appropriate material in each use case.
Let us know what you need or allow our engineers to recommend the best options.
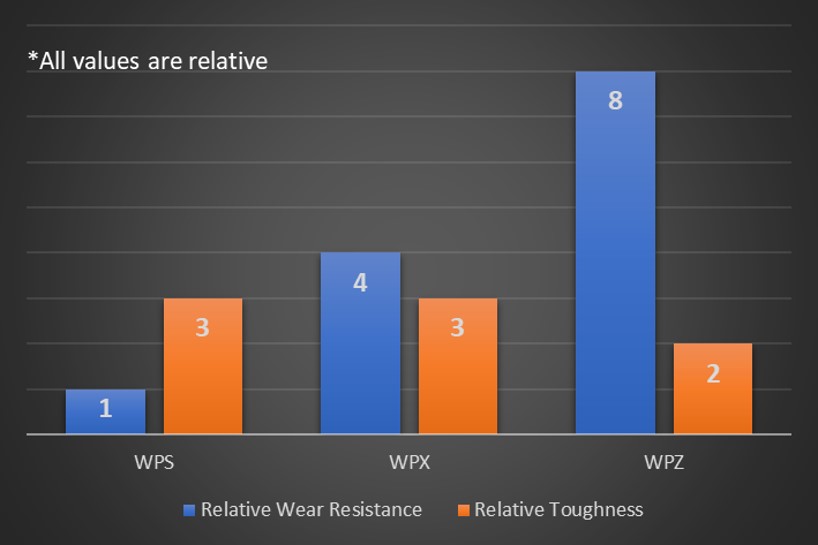
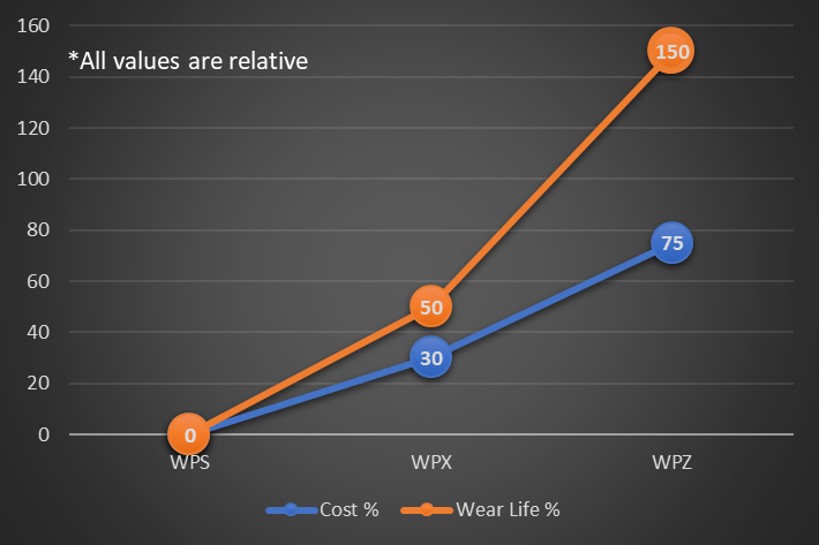
WPS – Oil hardening tool steel hardened to Rc 60-62.
WPX – A powdered metal high speed steel hardened to Rc 62-64; noted for its higher wear resistance without sacrificing toughness. Recommended for high frequency gauges.
WPZ – A powdered metal high speed steel hardened to Rc 64-66; extremely high wear resistance and moderate toughness. Recommended for master gears.
Get started today
CONTACT US
Let our team of technicians guide you through the process of defining and developing the solutions you need to produce your best.
